Been printing a lot of resin based 3D prints and I figured I’d show my process. Won’t go into unboxing and levelling the plate as there’s plenty of tutorials on that. This will be my setup and how I approach each print from slicing to cleanup with a couple of tips I’ve found along the way.
Printer Setup
The printer I use is the Elegoo Mars Pro using Elegoo Ceramic Grey water washable resin. The resin cures a matte grey and is fairly tough, although as with all resins it will easily snap on impact.
Hot tip: the Mars comes with a rubber seal that goes around the bottom of the UV shield. You’ll want to superglue this in place otherwise it’ll immediately come loose and fall into the vat.
Tools of the Trade
The printer should come with a number of tools that help you with the basics, here’s what I use. Ideally these tools should not be used outside your printing environment and more ideally only used wearing gloves.
Magnetic Build Plate
An extremely useful purchase is this magnetic build plate that attaches to the actual build plate. This allows you to pop off the plate, flex it and really push those stubborn models without fear of misaligning the build plate.
I used to use this a lot when starting out but found myself using it less and less after changing my printing process that joins all model bases together. Still, good for those starting out.
Nitrile Gloves
Resin is toxic and these are a requirement. Grab a pack of 100 and you’ll be good for a while. Use a single pair per print and replace if they get torn. Amazon
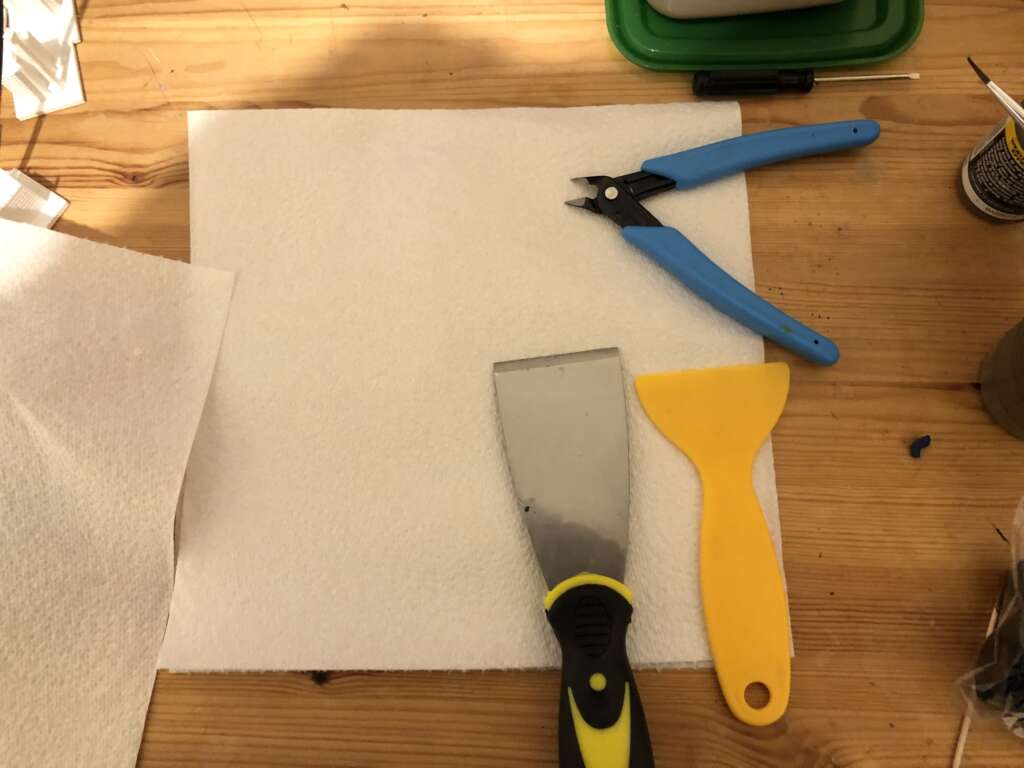
Metal Scraper
If the model is being being stubborn, use a metal scraper to careful wedge between the model and the plate. Be careful not to scratch the plate too much the (although with the magnetic plate above you’ll only damage a replaceable part).
Tweezers
The resin will be slippy and can be difficult to grab with the gloves. They come in handy getting those little pieces of resin out the way or helping with breaking the supports. Be careful of supports firing off in all directions.
Snippers
These are for the really stubborn supports and should be used as a last resort. Resin is damaged very easily so always snip near the supports never the model. Be very careful with these when wearing gloves, they will cut through those gloves like butter.
Micro-fibre Cloths
Papers towels tend to leave bits of fibre on the model when cleaning with them. Micro-fibre cloths will allow for more aggressive cleaning without any residue. They’re going to get covered in resin so replace them often. I tend to keep my left hand covered in the cloth so it cleans as I remove the supports, and also prevents the snippers from cutting the gloves.
Tiny Disposable Brush
This comes with the Elegoo resin and is surprisingly useful when it comes to cleaning the model, it can get to places the cloths can’t reach. Brush and stipple into the creases to remove excess resin / water. As with the cloth, replace often.
I haven’t been able to find the exact brush Elegoo send with their resin but these varnishing brushes are roughly the same size but the bristles are harder and can slightly mark soft resin.
A Plastic Washing Container
For cleaning the models you’ll want a large plastic container. This will end up filled with toxic water so don’t use something you’ll want to use later. The water will eventually evaporate, do not pour the water down the drain, the drainage system isn’t built to filter this.
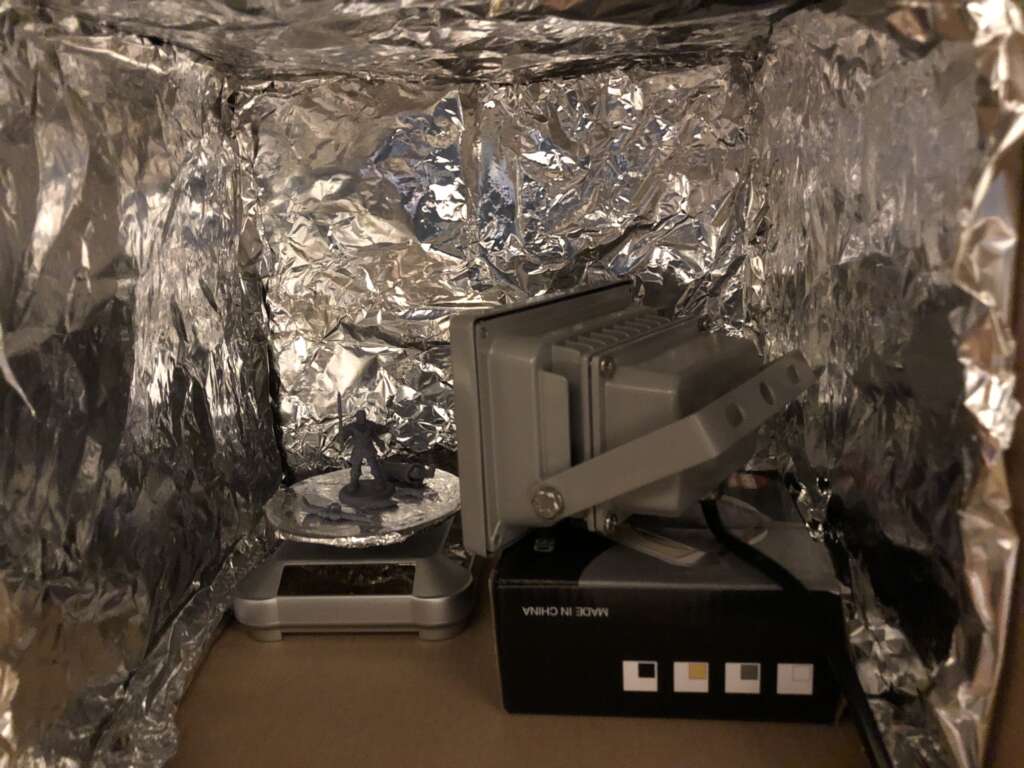
UV Curing Booth
Optional but recommended. I use this UV light and solar turntable inside a box internally covered in foil. Otherwise you can leave the model in sunlight for a couple of hours. There are less homebrew (and more expensive) ready built solutions available.
Models and Slicing
You can find printable models on most 3D marketplaces like MyMiniFactory or CGTrader and there’s plenty of creators on Patreon (use Mathew’s List Discord to find a monthly updating list). Although you can find printable files over on Thingiverse I find they’re usually geared for FDM printers; the addition detail that resin offers is usually reserved for paid models. Personally I always look for models that have been pre-supported by the creator, it makes it the whole process a lot less frustrating.
Using Chitubox (free but a bit clunky) or Lychee (free with optional subscription for features and remove ads) to slice the models, make sure to set the settings based on your printer, different brands have different presets and can cause over or under curing on the wrong settings. I haven’t modified the stock settings but mileage may vary. When placing the items, try and make all the bases overlap, this will decrease the chance of a model slipping and allow you to remove and clean all models in a single action.
Hot tip: the amount of time is based on the height of the tallest item on the print bed. 5 items of the same height will take the same amount of time as a single item. Load that build plate as full as you can with similar height models for more efficient printing.
Safety First
Resin can make you unwell if you ingest or inhale it, which can happen if you’re careless with the fumes, liquid resin or dust particles from sanding. Wear gloves, good airflow and clean your hands after each print. Keep out of reach of pets and children, you do not want them playing with this stuff.
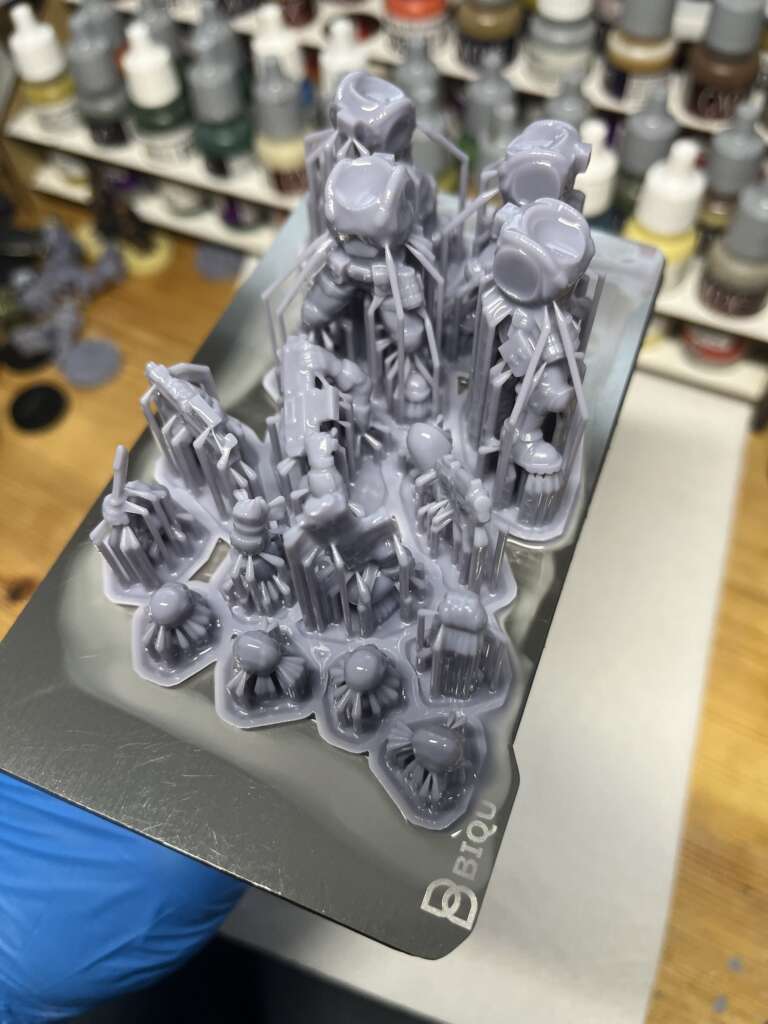
Printing
Before committing the print, check the resin levels are adequate, individual prints don’t use a lot of resin but you don’t want to be caught out. You can keep any excess resin in the tank after a print, just top if off. Every now and again take the plastic scraper and check for bits of model that may have fallen into the tank, you don’t want it damaging the FEP film.
There’s no Octoprint like remote monitoring for the Mars so I’ve pointed a webcam at the display and check back every now and again. The time estimates are usually pretty accurate.
Cleaning and Support Removal
After the print is finished, wait about five minutes for the excess resin to drip off. The model won’t cure inside the UV shield and can stay in their for an extended period.
While that’s settling, set down a paper towel folded in half. Any and all resin and tools used should remain on this paper towel and should only be removed for curing or cleaning. Set another single sheet of paper towel to the side for later. Prepare now, you don’t want to be messing around with resin covered gloves looking for something.
After waiting, put on your gloves and remove the UV shield. Carefully take the build plate and give it a wiggle to remain any excess. If there’s a lot, angle it to the side and wait for it to drip. Otherwise, place the build plate on the paper towel. Put the UV shield back on the printer.
If you’ve found you’ve got supports but no models, take a plastic scraper (do not do this with a metal one) and scrape lightly across the inside of the resin tank. If you feel any bumps you’ve probably got half a model stuck in there. You’ll need to try and pry that loose with the scraper or your fingers. Last resort drain the tank and remove the stuck piece.
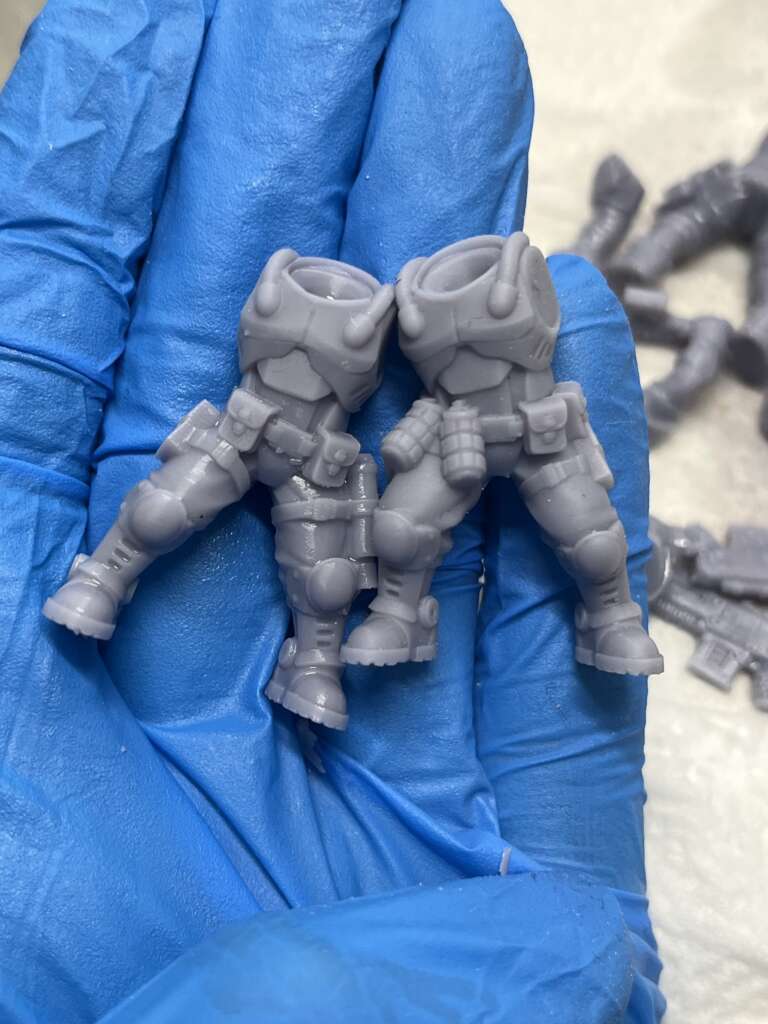
Remove the magnetic plate from the build plate. If all your models are touching, you should be able to easily remove them all in one go.
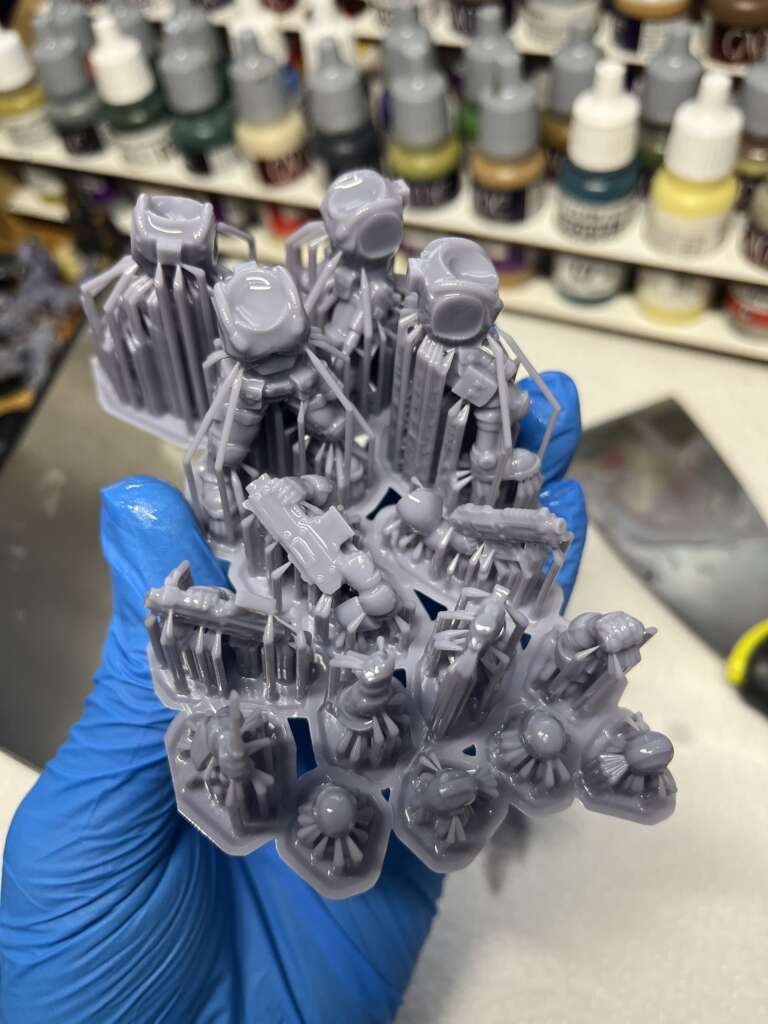
After all pieces are removed, you can start cleaning. If you joined them together, this will be fairly easy. Take the conjoined model and swish it around in the water. The model should be on or just below the surface to really get the water in all the crevices. If it’s a particularly small model, use the tweezers (but don’t drop it into the water!)
Keep your cloth in one hand and start removing each model and their supports. First is to identify any weak points; thin appendages, weapon barrels, that kind of thing. Start with those. Push on the supports with your other hand and hear the satisfying clicks of supports coming loose. If pushing on the supports doesn’t break them off, go in with the tweezers and as a last resort the snippers. You ideally want the supports to break naturally at the thin point where they attach to the model (but not too close as it can cause dimples). Be careful of loose supports, they can be sharp and cut through the gloves without you noticing.
Once all supports are removed, continue cleaning the model. Sometimes bits of supports and other gunk will be stuck to the model, give it another dunk into the water and clean it down with the cloth. Then take your brush and start brushing and stippling away, particularly between the creases the cloth can’t get to. The key here is to remove all shine. The entire model should be entirely matt.
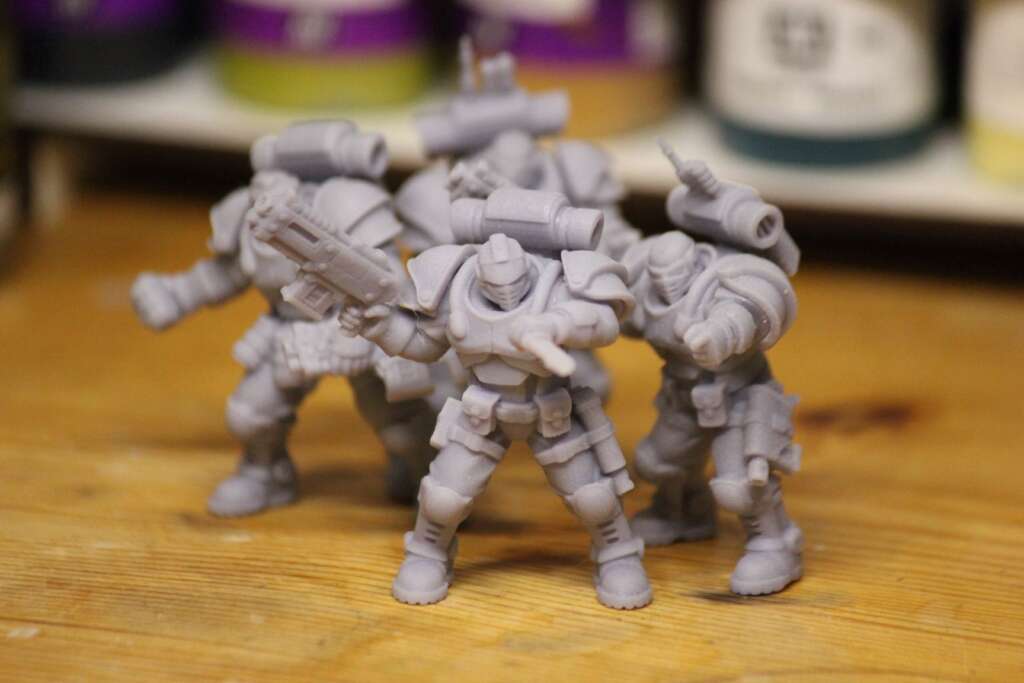
Repeat for all models. You should end up with a pile of cleaned, support free models and a pile of supports and possibly broken models (I keep these around for testing paint schemes). If you’ve got a UV curing box, place these models into it and turn it on.
While that’s cooking away, take your magnetic plate and any tools used and clean them with the spare paper towel you put aside earlier. I like to use a little water spritzing bottle to aid. Place your main build plate flat on the folded paper towel and clean with the loose towel; doesn’t need to be spotless, it’ll only get dunked again. Lightly clean the bottom to prevent it knocking out of position and put the metal plate back on (watch out for your gloves getting trapped). Using the inside of your wrists (which should be relatively clean) to remove the UV shield, reaffix the build plate and replace the shield.
You should be left with some paper towel and a pile of junk resin. Take these and bundle them into a ball into your right hand. Using your left hand, pinch the back of your right glove and fold it over the ball. Your right glove should now be inside out with the junk in the middle. Use your right hand to pinch the back of the left glove and do the same again. You should now have two glove free hands and an inside out ball of gloves and junk. This can be handled bare-handed and placed in the bin.
The models should be cured by now. Honestly I don’t know exactly know how to tell, but they shouldn’t be tacky to the touch and should be less flexible (but more brittle) than they were during cleaning.
Post Printing
After printing, cleaning and curing there’s one step that makes a model shine and that’s paint priming. Even if you aren’t going to paint them up, priming really makes the tiny details stand out. I use Tamiya Grey Surface Primer, it’s about twice as expensive on Amazon so shop around.